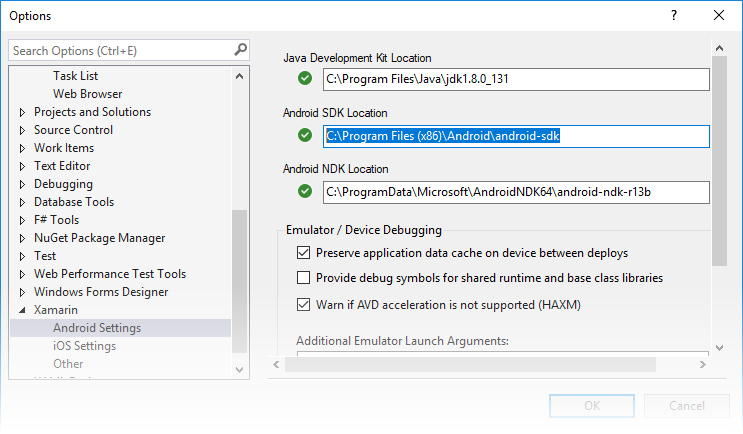
Troubleshooting Android SDK Location: Avoiding the Filesystem Root Issue
As an Android developer, setting up the Android Software Development Kit (SDK) is an essential step in creating and testing Android applications. However, you might encounter an issue where the SDK location cannot be at the filesystem root, i.e., directly in the C:\ (Windows) or / (Linux/macOS) directory. This problem can be frustrating, but don’t worry; in this blog post, we will explore the reasons behind this limitation and provide solutions to overcome it.
Understanding the Issue
The Android SDK is a collection of tools, platforms, and libraries that enable developers to build Android applications. By default, the SDK Manager expects the SDK to be located in a directory other than the filesystem root. This limitation is due to security concerns and best practices.
Reasons for the Limitation:
- Operating System Security: Placing the SDK at the filesystem root can pose security risks. It might allow unauthorized access to critical system files or lead to conflicts with other applications.
- Read/Write Permissions: Writing files directly to the filesystem root typically requires administrative privileges, which can cause issues with regular user accounts and might lead to accidental deletions or modifications.
- Best Practices: Organizing the SDK in a separate directory is a best practice to keep development-related files isolated and maintain a clean directory structure.
Troubleshooting the “Android SDK File is Missing” Error: A Comprehensive Guide
Solutions to the Issue:
- Choose a Proper Directory:
The easiest solution is to install the Android SDK in a different directory that is not the filesystem root. A common location is C:\Android (Windows) or /Users/your_username/Android (Linux/macOS). This approach ensures that you adhere to the recommended directory structure and avoid potential security and permission problems.
- Modify Environment Variables:
If you have already installed the SDK in the filesystem root, you can modify the environment variables to point to a different location:
- For Windows:
- Right-click on “This PC” and select “Properties.”
- Click on “Advanced system settings.”
- Click on “Environment Variables.”
- In the “System variables” section, find “ANDROID_SDK_ROOT” or “ANDROID_HOME” and change its value to the desired SDK location.
- For Linux/macOS:
- Open the terminal and edit the .bashrc or .bash_profile file using a text editor like nano or vim.
- Add the following line:
export ANDROID_SDK_ROOT=/path/to/your/sdk - Save the file and run
source ~/.bashrcorsource ~/.bash_profileto apply the changes.
- Reinstall Android SDK:
As a last resort, if modifying the environment variables doesn’t work, consider uninstalling and reinstalling the Android SDK. During the installation process, choose a directory other than the filesystem root.
Additional Considerations for Android SDK Management
Beyond resolving the issue of the SDK location, it’s essential to adopt some best practices for managing the Android SDK efficiently. These practices will not only ensure a smooth development experience but also enhance the performance and reliability of your Android applications.
1. Regular SDK Updates: Stay up-to-date with the latest SDK releases and updates. Android development is constantly evolving, and new features, enhancements, and bug fixes are regularly introduced. Keeping your SDK current allows you to leverage the latest advancements and improvements.
2. Use SDK Manager: Android Studio provides the SDK Manager, a dedicated tool for managing SDK components. Use this tool to install, update, and remove SDK packages as needed. The SDK Manager simplifies the process of managing various SDK components and ensures you have the necessary tools for development.
3. Manage SDK Platforms and Tools: You don’t need to install every available platform and tool in the SDK. Instead, install only the specific SDK platforms and tools required for your app development projects. This practice minimizes disk space usage and keeps your SDK environment clean and focused.
4. Utilize SDK Add-ons: Depending on your app’s requirements, you might need additional functionality beyond the standard SDK components. Android SDK add-ons offer specialized features such as Google Maps integration, Android Wear support, and more. Utilize add-ons as needed to enhance your app’s capabilities.
5. Test on Multiple Devices: Ensure your app is compatible with various Android devices and versions. Android Studio’s Virtual Device Manager allows you to create and manage virtual devices with different Android versions and configurations. Test your app on multiple devices to identify and resolve compatibility issues.
6. Backup and Version Control: Back up your Android projects regularly and maintain version control using Git or other version control systems. This practice helps safeguard your codebase and allows easy collaboration with team members.
7. Clean Unused SDK Components: As your app evolves, you might no longer require certain SDK components. Periodically review your SDK installation and remove any components that are no longer needed. This practice helps reduce clutter and keeps your SDK environment organized.
8. Utilize SDK Documentation: The Android SDK comes with comprehensive documentation, including API guides, code samples, and reference documentation. Leverage these resources to gain a deeper understanding of available features and functionalities.
Encountering the issue of the Android SDK location cannot be at the filesystem root is a common occurrence in Android development. By understanding the reasons behind this limitation and adhering to best practices, you can easily overcome this hurdle. Choose a proper directory for your SDK, modify environment variables if necessary, and maintain a clean and secure development environment. With these solutions, you’ll be all set to create amazing Android applications without any disruptions. Happy coding!

