SQL Server Management Studio (SSMS) is an essential tool for anyone working with SQL Server and Azure SQL Database. Whether you’re a database administrator, developer, or data analyst, SSMS provides a powerful graphical user interface for managing, querying, and optimizing your data. In this article, we’ll walk you through the basics of using SSMS 18.7, the latest general availability (GA) version of the tool.
Installation and Connection
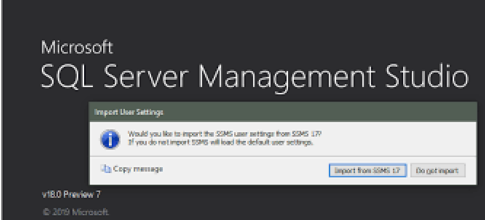
Step 1: Installation
To get started with SSMS 18.7, you’ll need to download the setup file from the official Microsoft website. The installation file is approximately 600 MB in size, and the tool is compatible with Windows 10 and later versions.
Pro Tip: Check out the official SSMS 18.7 release blog post for additional details.
- After downloading the setup file, run it, and follow the straightforward installation wizard.
- During installation, you can select your preferred language and installation location.
Step 2: Connecting to SQL Server and Azure SQL Database
Once SSMS 18.7 is installed, you can launch it from the Start menu or the desktop shortcut. Upon opening the tool, you’ll encounter the “Connect to Server” dialog box, where you can enter the necessary details to connect to your SQL Server or Azure SQL Database instance.
Connecting to SQL Server:
- Server Name or IP Address: Provide the server’s name or IP address.
- Authentication Mode: Choose between Windows or SQL Server authentication.
- Credentials: Enter your username and password.
- Default Database: Select the default database for your connection.
Connecting to Azure SQL Database:
- Server Name: Use the format
<server_name>.database.windows.net. - Authentication Mode: Select SQL Server authentication.
- Credentials: Enter your username and password.
- Default Database: Choose the default database for your connection.
You can also use the “Options” button to configure additional connection settings, including connection timeout, network protocol, and encryption.
Once you’ve provided the necessary information, click “Connect” to establish a connection with your SQL Server or Azure SQL Database instance. This action will open the “Object Explorer” window, where you can begin managing your databases and data.
Filezilla: Your Ultimate FTP Solution for Seamless File Transfers
Querying and Managing Data
SSMS 18.7 offers a plethora of tools and features for querying, designing, and managing databases and data warehouses.
Transact-SQL (T-SQL) Querying
T-SQL is the primary language for interacting with SQL Server and Azure SQL Database. To write and execute T-SQL queries:
- Open a new “Query Editor” window by right-clicking on a database or server in “Object Explorer” and selecting “New Query,” or use the keyboard shortcut Ctrl+N.
- In the “Query Editor” window, type your T-SQL queries.
- Execute your queries by clicking the “Execute” button, pressing F5, using the Ctrl+E shortcut, or selecting “Execute” from the Query menu.
- View query results in tabs like “Results Grid,” “Messages,” and “Execution Plan” in the lower pane.
Graphical Designers and Wizards
SSMS provides graphical designers and wizards for various database tasks:
- Creating Databases: Right-click on “Databases” or “Data Warehouses” in “Object Explorer” and select “New Database” or “New Data Warehouse” to use a wizard.
- Creating Tables: Right-click on “Tables” and select “New Table” to open a graphical designer where you can define columns, data types, constraints, indexes, and more.
- Creating Views: Right-click on “Views” and select “New View” to open a graphical designer for selecting tables, defining filters, joins, aggregations, and more.
Modifying and Managing Objects
You can modify and manage existing databases and objects using graphical designers and wizards:
- Modifying Databases: Right-click on a database in “Object Explorer” and select “Properties” to change settings like name, size, collation, and recovery model.
- Modifying Tables: Right-click on a table and select “Design” to access the same graphical designer used for table creation.
- Modifying Views: Right-click on a view and select “Design” to edit tables, columns, filters, joins, and more.
Data Management
SSMS 18.7 allows you to manage data efficiently:
- Data Editing: Right-click on a table or view and select “Edit Top 200 Rows” or “Edit All Rows” to open a grid for data editing.
- Data Import/Export: Use the “Tasks” menu to import/export data from/to your database, configuring mappings, transformations, and error handling as needed.
Deployment, Monitoring, and Upgrading
SSMS provides essential tools for deploying, monitoring, and upgrading data-tier components used by applications.
Deployment
Use the “Deploy Database to SQL Azure Wizard” or “Deploy Database to a SQL Server Wizard” to create deployment packages for transferring objects and data between instances. Right-click on a database in “Object Explorer” and select “Tasks” to access these wizards.
Monitoring
SSMS offers tools like the “Activity Monitor,” “Performance Dashboard,” “Data Collector,” and “SQL Server Agent” for monitoring and analyzing server and database performance. Right-click on your server or database in “Object Explorer” and select “Tools” to access these monitoring tools.
Upgrading
For upgrading data-tier components, utilize tools like the “Upgrade Advisor,” “Database Upgrade Assistant,” “Data Migration Assistant,” and “Data-Tier Application Framework (DACFx).” These tools assess compatibility, generate reports, and guide you through upgrade and migration processes.
In conclusion, SQL Server Management Studio 18.7 is a versatile and indispensable tool for SQL Server and Azure SQL Database users. Whether you’re a seasoned DBA or just getting started with databases, SSMS simplifies data management, analysis, and administration, making your tasks more efficient and manageable. With its array of features and user-friendly interface, SSMS is your gateway to mastering SQL Server and Azure SQL Database.